One of the most important parts of painting your home is actually the planning and preparation part.
Here’s a step by step guide of everything you need to do in this stage of the process:
Tip #1 – Covering and protecting surfaces
This part includes preparing and protecting all your surfaces, making sure the walls are clean and ready, as well as covering and protecting all your curtains, furniture, lighting fixtures and so on, so that you can avoid any accidental spills and splashes.
Tip #2 – Removing all nails and screws
The next thing you’ll need to do is cover all outlets and remove all nails and screws from the wall as well as all the paintings or anything else that’s left hanging on the walls.
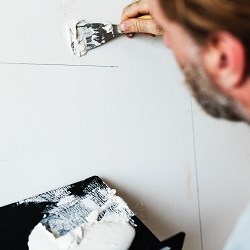
Tip #3 – Filling holes and sanding
The next steps after you’re done cleaning the surfaces are fixing and filling holes, and sanding the surfaces. This step includes peeling loose pieces and cracks in the walls, filling the holes with primer and smoothing them out with a little bit of sandpaper to make sure the surface is ready for painting.
Tip #4 – Using painter’s tape
Before you head on to the next part you might want to buy some masking tape or painter’s tape so that you can get everything done faster and you can be sure that all your sides and edges are protected. If you want to avoid using tape, and save on time putting it up, then you’ll need to get a smaller brush in order to get the more difficult parts painted precisely and without going outside the lines.
Tip #5 – Buying paint
The next thing you’ll want to get ready is your paint. Make sure you don’t buy too much paint to avoid wasting it. You’ll need to estimate how much paint you’ll need to buy to make sure you don’t run out in the middle of painting.
If you’re painting your entire home, you’ll be better off buying in larger cans which will save you some money in the process. You should avoid buying the cheapest paint there is, because you’ll just end up needing to paint more coats, which will ultimately cost you more. You should also consult the manufacturer’s advice on the label or ask the salesperson how much paint you’ll need for the square footage you need to cover.
When buying paint, you should not only consider the price and type of paint, but you should also consider which type would go well with which room. You can buy the first glycerol paint you see in the store and paint everything with the same paint, just don’t be surprised when the bathroom crack and you’re out there buying a different type of paint in a few months.
The bathroom and the kitchen require specific paint types because of their particular conditions. Technical paint is usually recommended in these situations so that your paint doesn’t age prematurely, leaving you with cracked walls and a lot of work that needs to be done all over again.
Tip #6 – Getting your brushes ready
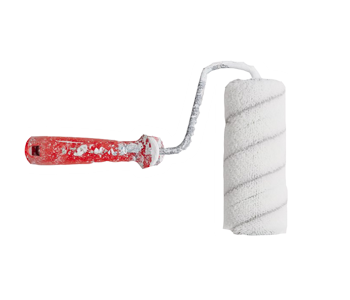
Once you’ve decided on which paint to buy, you’ll also need to get your brushes ready. There are a lot of different types of brushes you can use, although the most efficient way to paint walls, especially in large rooms is by using a roller. A roller is a must-have item for every painter.
You can use the smaller brushes with angled bristles to paint edges and corners near baseboards in order to achieve a much more accurate and precise result.
Choosing the perfect brushes also depends on the type of paint you’re using and the surface that you’re painting. For example, natural-bristle brushes go well together with oil based paints while polyester brushes go well together with latex ones.
Another important factor to consider when buying brushes is the different sizes and styles they come in. Your decision will of course depend on the size of the room you’re painting, whether you’re painting the wall, cabinets, chairs or tables and on the type of project you’re doing.
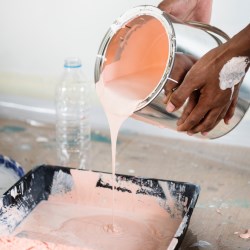
Once the preparation process is complete, you’re going to get your paint opener and a stir stick.
You need to stir your paint every time you pour more of it into the tray, before you start rolling.
That way you can have an even sheen on each wall of your room.
You can pour out the paint into a bucket or a pan, depending on the project you have and the amount of space you need painted.
Make sure to clean the rim of the can of paint carefully so that the lid closes properly, which will keep the paint fresh and usable for your next project.
Once you’ve poured your paint, and have your roller and your brushes ready, you are ready to paint your home.
Should you use brushes or a machine?
Good question because you have two main options here.
- The manual method using rollers and brushes
- The more high tech method with a spray gun
You can easily get brushes and rollers from your local HomeBase or even on Amazon.
The problem with them is that it takes a lot of time.
With a spray painter gun, things get done a lot faster! Check out this video of one in action:
https://www.youtube.com/watch?v=epSJIYUT650
Quite satisfying watching it, right?
That’s the Graco Magnum x5 in action. It’s not currently available on Amazon UK anymore, but I found one on Ebay – ships from the US though.
If you’re thinking about one, check out this review. It’s US based but it’s still applicable to the UK market.
Now to the practical part…
If you want to avoid using a ladder, your best option would be to get an extension pole for the roller.
You don’t want to get the cheapest one out there, because the better the quality is, the less flex you’ll get, which ultimately means more coverage.
We already mentioned that there are multiple different types of brushes available, suitable for different projects; however, there are two types of brushes that are a must.
- A soft angled brush that you can use for cutting-in, a term we’ll discuss a bit later.
- A short firm flat brush for touching up, after you’re done with everything.
How to Choose the Right Paint
As we mentioned before, there are tons of different types of paint out there, so it’s no wonder that people often get confused when trying to pick the right one for their job.
Here are some tips on when to use which paints:
Tip #1 – Gloss
Gloss paint comes in many forms and is best used for painting both exterior and interior woodwork.
Tip #2 – Emulsion paint
For those of you who are not familiar with the term, emulsion paint is a water-based paint with added acrylic or vinyl resin with various degrees of sheen depending on the finish.
What this means is, the shinier the finish, the tougher the paint will be.
Emulsion paint is generally used for painting the interior of the house, and is perfect for both the walls and the ceilings.
Some other types of paint finish include:
- Chalky
- Matt
- Eggshell
- Satin
- Silk and soft sheen
- Masonry paint
Other than these types that are used more frequently, there are a few special types of paint that are designed for specific jobs. Those include:
- floor paint
- radiator paint
- undercoat
- primer
- limewash
- polyurethane varnish
- chalk paint
- stain block
All of them have a different purpose and can be used for different and specific reasons.
If you’re still not sure which paint to use, this manual will help you choose the right type of paint for the correct surface of your home.
Since we already covered the most important parts of the preparation process, the types of brushes and paints you’ll need to use and how to go about choosing the right tools for the job, let’s go over to the painting part.
The Easiest Way to Paint Your Home
A quality paint job is the easiest and least expensive ways to transform your home and make any room look good.
Once you’ve bought enough paint, and you’ve gotten all your tools and brushes on hand then it’s time to get down to business and start painting.
Here’s the general plan you’d want to stick to. You should start from the ceilings and work your way down, finishing with the walls and the cutting-in.
We already mentioned cutting-in before, but if you’re not familiar with the term, cutting-in actually means painting around the edges with a brush, before you get started with your roller.
The easiest way to do it for some people is by using masking tape or painter’s tape and then just painting above or below it. Others feel like they could use the time spent on masking to do a lot more painting which is why they avoid using masking tape at all.
There is one more benefit to not using masking tape, and that is practicing your brushing skills, which will help you do an even better job of cutting-in next time, and that’s a big plus.
Here are a few tips that will help you master the cutting-in process.
Now, let’s get back on track and onto the step by step guide for painting like a pro!
If you’re using more than one gallon of paint make sure you mix all of your cans of paint in one big bucket so that you can get colour consistency, which is generally known as boxing.
Painting the ceiling and the walls are very similar processes.
Here’s a step by step guide for painting a room like a pro:
- Open up the paint
- Mix it up in a larger bucket to insure consistency (boxing)
- Brush the edges (cut-in), then use your roller to finish the job
- Get a wet towel and dampen the roller cover with it to help the paint load easier
- Dip the roller just a bit and roll it to even the paint out
- Don’t submerge the whole roller, it will just make things messier
- Start from the edges and roll in a W-pattern (zig-zag pattern)
- Roll in several directions and don’t press and squeeze the roller
- Don’t roll too fast, or you’ll risk getting a lot of splatter
- Turn the roller sideways to get close to the edges
- Do the ceiling first then mask off the edges using painter’s tape
- Start on the walls, repeating the same process as with the ceiling
- For cutting-in, dip the brush only a third of the way and tap it against the sides
- Paint with smooth strokes
- Try not to get paint on the trim and on all the outlets, so that you have less to clean later on
- Paint each wall at a time
- Do two coats per wall, three if they haven’t been painted in a really long time and two coats just won’t do it
- Do the trim last, after you’re done with the walls
- Again, you can use a painter’s tape, or not, whichever way is easier for you
Cleaning
Once you’re done painting, it’s time to clean everything up, and get everything back into place.
Here’s what you’ll need to get the cleaning part over with as soon as possible:
- Rags
- Rubbing alcohol or white vinegar
- Newspaper
- Cleaning brush
- Hand wash
- White spirit
- Cling film
Cleaning Paintbrushes
The most important part when it comes to cleaning your paintbrushes is to do so as soon as possible. If you’re not done painting and have a bit more work left for tomorrow, just wrap them up in cling film which will keep the moist and ready for later use.
If you’re finished painting then start by removing the excess paint off the brush with a piece of newspaper. Once you’re done with that part, you can just run it under cold water and use a scrubbing brush to get all the paint out, so your brush doesn’t get all sticky and ruined.
You can use tap water for water-based paints, like vinyl or emulsion paint, but you will need to use white spirit first when it comes to oil-based paints. After that you can use some hand wash to rinse the brush and then just run it under water again.
Cleaning Paint Rollers and Trays
As soon as you’re done painting, take a few minutes to clean your paint roller and your trays so that you can use them for your next paint job.
Here’s how you go about cleaning the tray:
- Run cold water on it
- Use a scrubbing brush to remove the paint
- Give it a rinse and dry it off using a rag
Here are the steps to properly clean your roller:
- Remove as much of the paint as possible using a scrap board
- Slide your hand over the roller sleeve to remove the excess paint
- Run it over cold water
- Remove the sleeve from the frame and clean it using a scrubbing brush
- Place it back on, rinse it off and store it in the upright position to dry
How to Get Paint Off Of Carpet and Flooring
If you decided on using masking or painter’s tape, then the first thing you’ll need to do is get it off the walls slowly and without damaging the area. Read the instructions on the tape, where you’ll probably find the optimal removal time recommendation on them, and follow those precisely.
The next thing you’ll want to do is clean the windows using a sponge or a cloth and some cold water. If you start cleaning everything right after you’re done painting, chances are the paint will come right off; if not, you can use white vinegar and a clean rag to clean the more stubborn paint spots. You can use a bladed window scraper to get rid of spots on the glass or on the edges.
Once you get everything cleaned up, make sure to return everything the way it was, and store away all your tools, so you can have them ready for next time.
And if you want to step up your painting game even more, than you should check out some of these 25 cool painting ideas for boring walls and bring a bit more fun in your home.