If you own a garden, then pruning is inevitable
Pruning your trees can be a difficult task but beneficial if you perform the task with caution
You only need the knowledge on how to prune trees correctly. You only need to avail yourself because the job requires ample time; no rushing.
Experienced gardeners will tell you the right season for pruning trees is the summer. This is when the tree’s growth reaches the peak, and therefore, trimming them will slow down the branch or tree development.
The pruning process is a necessary task that seems complicated, but proper prior preparation and planning will enhance your garden’s long vibrancy and health.
Step by step guide on how to prune trees properly
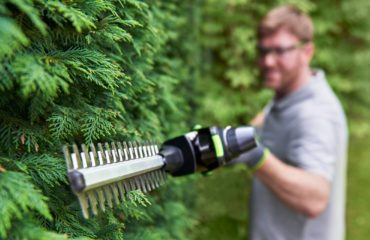
At least you now understand when to prune your trees. The next thing will be to use this pruning tools guide to perform the task comfortably and correctly. Remember, you prune a tree to reduce shade and remove damaged tips or branches. Pruning is also useful to shape a tree the way you wish.
Step one: Inspecting the area
Don’t rush to prune a tree; take your time, and assess the tree, including the number of branches, shape, and size. Try also to imagine how the tree will look like when you finish the pruning process.
Under this step, you are also supposed to identify the tree’s main branches; they make the tree’s skeleton. It would help if you were careful not to cut them; you will kill your tree. You should also check where the branches will fall and where you can stand while cutting some branches.
It would also help if you were sure that there are no children, pets, or any other object broken by the falling branches.
Step two: Start by removing damaged branches
Either diseases or a storm may damage some branches. You should remove these broken branches to distribute their water and nutrients to other healthy components. Why should they take nutrients or water, yet they are damaged; they will interfere with the entire tree’s growth.

Remove damaged branches first
Step three: Clear the shady parts first
For this step, you need to make sure to remove all cross branches. Doing so will open the tree for smooth air circulation and light penetration to all areas of your tree. You need to know that your trees need smooth air circulation around it, allowing the plant to grow healthy.
Furthermore, you should remove all branches that are growing towards the center of your tree. Failure to clean will lead to cluttering and unhealthy tree conditions.
Step four: prune all branches that may interfere the process
It doesn’t matter whether they are higher or low branches; is they may interfere with your walkaway, remove them. Sometimes these higher branches may halt telephone wires, overhang the house or rub your roof.
Therefore, such branches need to be pruned to reduce some obstructions to enhance a suitable environment without annoyance.

Strategically remove branches that block light and your pathway
Under this step, you may also trim the tree to achieve a particular shape, depending on your desires. Remove those branches sticking out at awkward angles; remember, a few cuts may make a huge difference.
When pruning also, you need to know that less well thought out cuts may expose the tree to diseases and fungus. So, it would help if you cut off not more than 25% of the branches of the tree. Also, let the pruning process be seasonal, don’t do it regularly. Furthermore, it would help if you made sure there are living branches for the tree’s growth.
Step five: Make a shallow cuts beneath heavy branches
This cut should not go too deep int the branch; it prevents the unit from cracking when it falls. This is a normal situation, especially when the branch is long. So, it would help if you made the shallow cut on the stem collar of the branch.
The stem collar is that part of a tree where most branches protrude from. Here, it would be best if you did not tamper with the collar; leave it intact by avoiding any cuts to it.
Step six: Cut the branch a few inches from the tree trunk
This should be your second cutting that involves leaving an allowance of about 15 inches from the trunk. What will be left is a stub.
Step seven: Eliminate the stub
Now that the branch is down, finish by making a finishing cut to eliminate the stub. Under this step, you should make sure to make precise cuts. Making such cuts will ensure the tree heals quickly and in a healthy way.
Step eight: Clean your equipment
After the above steps are successful, the next thing will be to disinfect the pruning equipment using rubbing alcohol. Doing so is necessary because sometimes you may cut into a diseased area of the tree and leave some of that on your tools.
Therefore, it is a must to leave your pruning tool/equipment disinfected. Rub or dip the blades using an impregnated cloth with disinfectant before you move to another tree. Sometimes you may spread diseases through your dirty pruning tools.
Frequently asked questions
Q: Why make a shallow cut beneath the tree branch?
A: The shallow cut is useful to ensure the branch doesn’t crack when falling. This art is typical when cutting heavy branches that end up leaving the tree with injuries. The injuries can expose it to diseases.
Q: Why should I remove first the cross branches?
A: Clearing bushy/cross branches will open the tree for smooth air circulation and light penetration to all areas of your tree.
Conclusion
From the above article, it is clear that if you don’t prune your trees, the garden will look shaggy and awkward. Tree branches will stretch in different directions, and your garden will look bushy. Therefore, this handy guide provides you with appropriate knowledge on how to prune trees properly using one of the suitable garden tools.
Pruning your trees at the right time and season will leave them healthy without diseases or fungus infections. Besides, proper maintenance of your garden will prevent damaged branches from consuming nutrients and water utilized by healthy tree branches. Moreover, pruning will allow light to reach all parts of the plant, enhancing its growth and development.